How to Build a Porch Step by Step: From Design to Done in Buffalo
If you want to build a porch, a step by step plan matters more than anything you pick out of a catalog. A porch is not a deck with a roof slapped on. It ties into your house framing, carries snow load, and follows a different permit path in most Western New York towns. When you build porch steps, railings, and the floor structure correctly from the start, the whole process—design through final inspection—becomes manageable. This guide walks through the whole process, design through final inspection, so you can compare a porch against an open deck and know what a good builder should be doing at each stage.
A quick note on who this is for. Maybe you bought a new-construction home with a bare backyard and you are weighing a screened porch against a composite deck. Or maybe your old deck is rotting and you are wondering if the replacement should have a roof this time. Either way, the sequence below is the same.
Step 1: Decide Between a Porch and an Open Deck
Start with the roof question, because it changes everything downstream. A porch is a roofed structure. That roof adds shade, rain cover, and bug protection if you screen it. However, it also adds structural load, ties into your house, and raises the cost per square foot compared to an open deck.
Here is how the trade-offs usually break down in Buffalo and the surrounding WNY towns:
- Open deck: Lower cost, simpler permit, full sun. You lose it to rain, and composite boards get hot in July.
- Covered porch: Usable in rain, shields the door from weather, cuts sun fade on furniture. Costs more because of roof framing, and the roof must be engineered for lake-effect snow load.
- Screened porch: Everything a covered porch does, plus no mosquitoes in August. Screens add material and labor, and you give up the open-air feel.
For a rough cost anchor on the deck side of the comparison, a professionally built deck averages $30 to $60 per square foot according to NerdWallet, citing Angi. A roofed porch runs above that because of the roof structure, so budget accordingly. If your total budget is under five figures, an open deck is usually the realistic option.
Step 2: Design the Porch Around Your House, Not a Catalog
Next, work out the design on paper before anyone orders lumber. A custom porch has to match your roofline, your door locations, and how water sheds off the house. A back porch off a kitchen door needs a different layout than a front porch addition that changes your curb appeal.
Key design decisions to lock down at this stage:
- Footprint and ceiling height. A porch feels smaller than a deck of the same size because the roof encloses it. Most homeowners who plan seating for six people want more depth than they first sketch.
- Porch roof options. A shed roof is the simplest and cheapest. A gable roof looks better on many front porches and sheds snow well. Tying into an existing roofline costs more but looks original to the house.
- Open, covered, or screened. Decide now, because screened porches need framing sized for screen panels and often a different railing detail.
- Flooring. Tongue-and-groove porch flooring, composite deck boards, or pressure-treated wood. Composite and PVC handle Buffalo freeze-thaw cycles with less upkeep than wood.
This is also where custom porch building separates from a package deal. A good deck builder will walk the site with you, check where downspouts and grade direct water, and flag anything about your foundation that affects the plan.
Step 3: Handle Permits and Code Before Breaking Ground
Permits come before shovels, every time. In Erie County, each town or village runs its own building department, so the process in Amherst differs from Cheektowaga or the City of Buffalo. A roofed porch almost always needs a building permit, and many towns want stamped drawings because the roof connects to the house.
Code points that matter for WNY porches as of 2026:
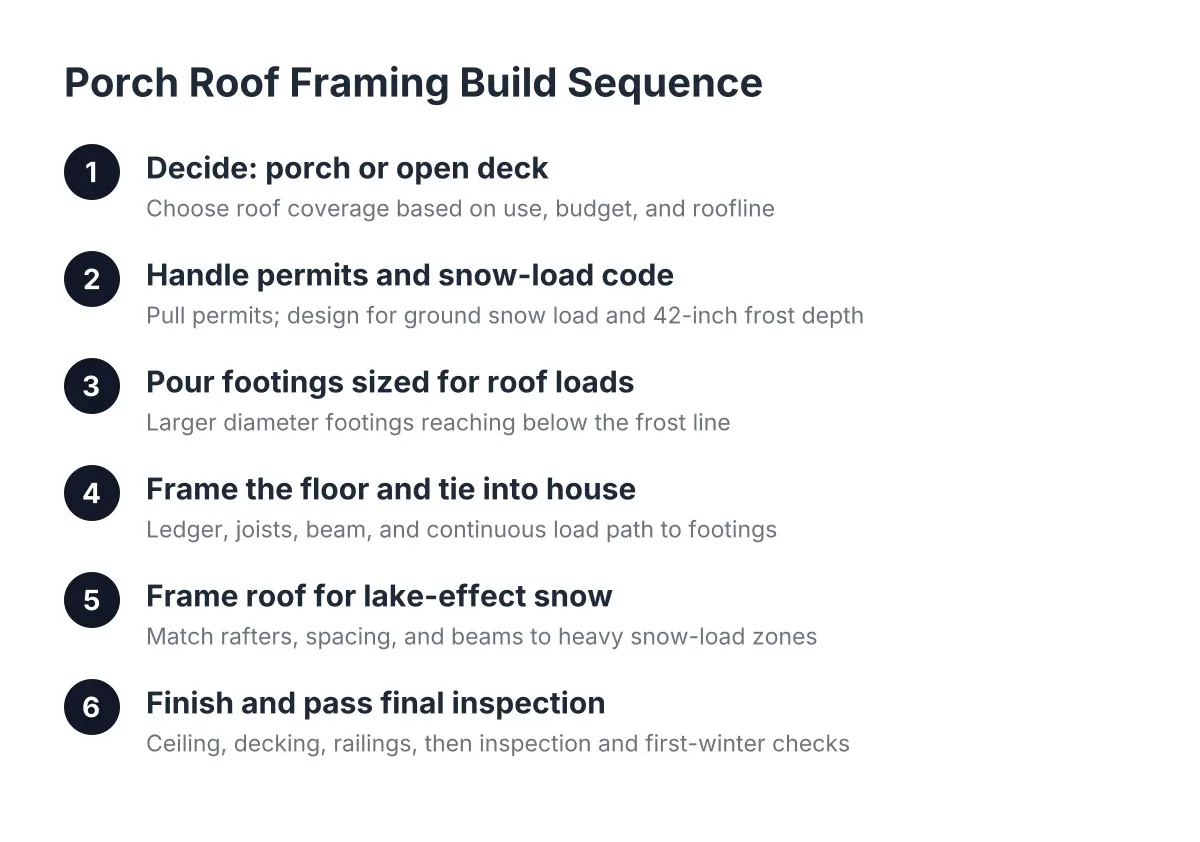
- Frost depth. Footings in this region go down 42 inches so frost heave does not lift your posts every winter.
- Snow load. Lake-effect snow means the porch roof framing gets sized for heavy loads, not the lighter numbers a southern plan set might use.
- Guard height. Under New York's residential code, a walking surface more than 30 inches above grade needs a 36-inch guard, according to Mister Baluster. That applies to your porch floor and your steps.
Skipping permits is a false saving. It can stall a home sale, void insurance coverage, and lead to fines. As a reference point for how steep penalties can get, unpermitted deck work in NYC carries fines from $2,500 to $25,000 plus daily penalties, according to PermitsGuide. Local WNY penalties differ, but the lesson holds.
Step 4: Pour Footings and Frame the Floor
With the permit in hand, construction starts at the bottom. The crew digs and pours concrete footings to that 42-inch frost depth, then sets posts and beams. The floor framing for a porch looks like deck framing with one difference: the posts continue up, or new posts land on the floor, to carry the roof.
Drainage matters here. The floor should slope slightly away from the house so rain that blows in runs off instead of pooling against your siding. The ledger connection, where the porch attaches to the house, gets flashed so water cannot reach the rim joist. Rotted ledgers are what kill most old decks in this region, and anyone replacing a failing deck knows what a soft, spongy board near the house feels like underfoot.
Step 5: How to Build Porch Steps Safely and Correctly
Front porch steps deserve their own stage because they fail more inspections than any other part of the job. Whether you need a single porch step or a full run of stairs, the sequence is the same: measure total rise, divide into equal steps, cut stringers, and attach treads.
Here is the short version of how to build porch steps step by step:
- Measure the total rise from grade to the porch floor. Divide by a comfortable riser height, around 7 inches, to get your step count. A 14-inch rise means two steps; a 21-inch rise means three.
- Keep every riser equal. Uneven steps trip people and fail inspection. This is the number one defect on DIY wooden steps for a porch.
- Pour a landing pad. Stringers need to rest on concrete or a solid footing, not bare dirt that heaves every freeze-thaw cycle.
- Cut and set stringers. Three stringers minimum for standard widths, more for composite treads, which flex more than wood.
- Add treads and risers. Composite treads skip the yearly sealing that wooden steps demand in Buffalo winters.
- Install railings where required. Stairs with four or more risers need a graspable handrail under the residential code.
Anyone comparing bids should ask how the builder handles the stair landing and footings. If the answer is "the stringers sit on patio blocks," keep looking. Frost moves patio blocks.
Step 6: Frame the Roof and Tie It Into the House
The roof is what makes this a porch, and it is the part that demands real framing skill. The crew frames rafters or sets trusses, ties the structure into the house wall or existing roof, then sheathes and shingles it. Flashing where the porch roof meets the house is the single most important waterproofing detail on the whole project. Done wrong, it leaks into your wall for years before you see it.
Snow-load framing is not optional here. A porch roof in Western New York can carry serious weight by February. Rafter size, spacing, and the beam carrying the outer edge all get sized for that load, and the posts and footings below carry it down to the ground. This is a stage where hiring a professional is the honest recommendation; a sagging porch roof is far more expensive to fix than to frame right.
Step 7: Finish the Floor, Railings, Screens, and Ceiling
Finally, the porch gets its finished surfaces. Decking or porch flooring goes down, railings get installed to the 36-inch guard height where the floor sits more than 30 inches above grade, and screen panels go in if you chose a screened porch. A beadboard or tongue-and-groove ceiling hides the rafters and gives the space a finished look. Lighting and a ceiling fan are easy to add now and a headache to retrofit later.
The final inspection closes out the permit. Keep the paperwork; it matters when you sell the house.
What a Realistic Porch Project Timeline Looks Like
Say a homeowner in Tonawanda wants a 14-by-16 screened back porch on a new-build with a bare yard. In that scenario, a typical sequence runs: two to three weeks for design and drawings, two to six weeks for the town permit depending on the department's backlog, and two to four weeks of construction once footings are poured. Weather stretches that in spring, when the ground is still thawing, and in late fall.
Labor is a large share of the budget on any roofed structure. For context on the deck portion alone, professional labor typically runs $15 to $35 per square foot according to NerdWallet, citing Angi, before you add roof framing, shingles, and screens. Exact porch numbers depend on your town, your roof tie-in, and your material choices, so get line-item quotes rather than a single lump figure.
The Honest Bottom Line
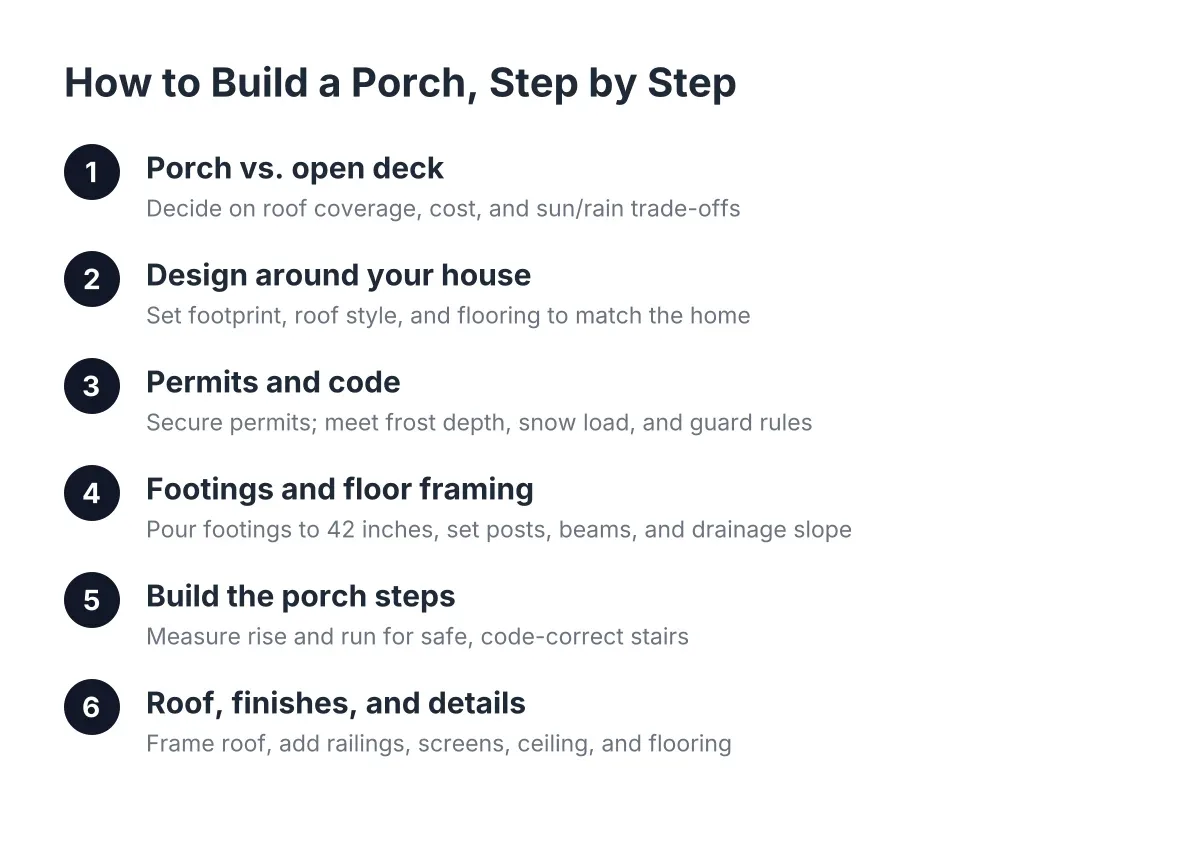
To build a porch step by step means getting seven things right in order: the deck-versus-porch decision, the design, the permit, the footings and floor, the steps, the roof, and the finishes. Skip or rush any one and the problems show up two winters later. If you are replacing a rotting deck, this is the moment to decide whether a roof earns its extra cost. If you are starting from a bare backyard, nail down the roof question first, because everything else follows from it.
If you need deck building, WNY Deck Builders can help.
Prefer to talk it through? Call (716) 317-4901 — a quick call is usually the fastest way to get a straight answer for your situation.